Any carpenter worth their salt will have an established set of skills that they turn to again and again. However, they also possess something else that makes a big difference: A knowledge of methods for saving time or making life as a carpenter easier.
Over time, carpenters learn new techniques to perform tasks they’ve done a hundred times before. So, here are 10 top tips to help you work smarter, not harder, in your woodworking business.
Tip 1: Lay Wood Out the Triangular Way
It’s easy to mix up wood pieces while laying them down, especially if you have many cuts of the same length. It’s acceptable to number the parts and where they join but using a triangle shape is considerably easier. When the pieces are moved, you can instantly visualize their relative positions because the triangular shape can only be formed in one way when they are all together.
When your pieces are in the perfect place, scribble a triangle on them, making sure that some portion of the triangle hits each piece you wish to register. Using a straight edge to keep even the most complex glue-ups properly referenced is quick and easy.
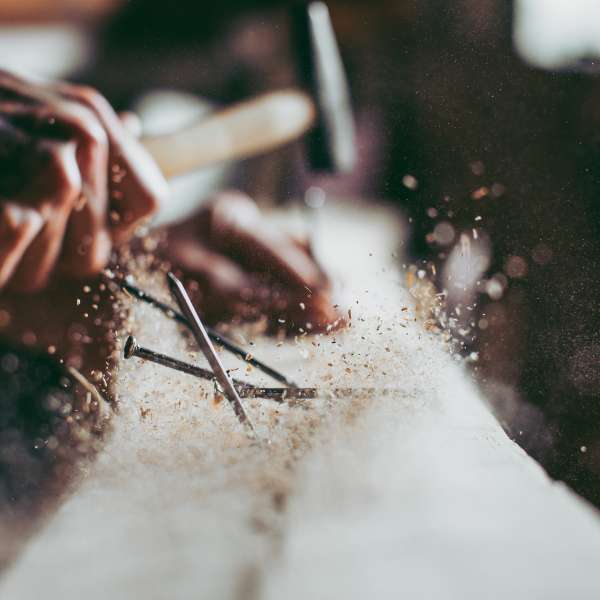
Tip 2: Mark Cut Lines
When measuring the material to be cut, make a small tick mark on the side you want to cut. This simple step will help you account for kerf, the thickness of the blade you’re cutting with, while also saving a lot of time remeasuring.
When you cut wood, you generate waste in the form of sawdust. Kerf is the discrepancy between the right and left sides of the saw teeth. The blade kerf eats into your measured section if you just cut exactly on the defined line, causing your cut to be erroneous. While this may not seem like a major issue, if you’ve ever had a job go wrong by an eighth of an inch, you’ll understand how aggravating this can be.
One way to overcome this problem is to measure your piece and mark one side of the measured line with a little tick to indicate which side to cut. Once you’ve measured your area, align your blade with the line, ticked side up, so the kerf is on one side of the line and not in your measured area. This is an excellent way to keep each other aware of the regions to cut if you ever work with a partner and share responsibilities.
Tip 3: Dowels with Straight Lines
Every now and again, you will be required to cut a straight line on a dowel. This can appear difficult despite having all the fancy measurement instruments at your disposal. The answer, however, is simple: insert the dowel into any straight slotted surface. In the workshop, that may be the track of your table saw.
Don’t have access to a table saw? Any door jamb or casing will work. This method can be used on any cylindrical object that requires a bisecting line.
Tip 4: Use Story Sticks
Producing correct measurements is vital, but making a story stick, a measured reference that can be quickly fashioned out of any squared scrap hanging around, is an easy way to cut down on repetitive measurements.
Story sticks are fantastic because they can be as specific as you need them to be, are less burdensome than a tape measure, and there’s no way to misunderstand a measurement once you’ve marked it.
A story stick can also be made by drilling holes at a consistent distance from an edge, extending this concept even further. As usual, make a story stick, but this time drill a hole at the measured point. Now you may use your story stick as a drill guide.
Tip 5: Drill Depth
Sometimes, you may need to drill a hole that does not go the whole way through the material. While it is relatively straightforward to set up stops on a drill press, there may be some situations in which the press isn’t quite the right tool. However, simply position a small piece of tape to mark the intended depth of the bit, and you’re good to go.
Tip 6: Glue Clean-up
Glue can be particularly handy for a variety of woodworking projects. Although applying glue is straightforward, it can occasionally get messy. Cleaning up glue is as simple as rubbing sawdust into the glue and rubbing it around to absorb the excess glue while it is still wet. This is better than using a damp cloth or sponge to remove glue since moisture can cause wood to expand.
It’s even easier to remove glue from your hands. If you have any glue on your fingers once your item is secure, simply rub your hands together to remove it. Wet or damp glue should just flake away.
Tip 7: Keep Slippery Glue-Ups Stable
Not every glue operation goes smoothly, and wood pieces occasionally try to separate when clamped together. This can often happen if you’re using a single clamp to secure many pieces that have been bonded together. Sprinkle a small bit of salt onto the glue before clamping as a quick cure.
The salt crystals keep the parts from sliding about. The salt is embedded in the wood during clamping and is undetectable from the outside.
Tip 8: Use Wax Paper
Positioning a piece of wax or parchment paper under your wood as you glue it not only keeps your workbench clean by capturing glue drips, but it also keeps your work from clinging to the bench as it dries.
Instead of using the roll’s serrated edge, unroll more wax paper than you think you’ll need and trim it to the exact form once it’s under the piece. To rip a clean edge on the wax paper, use a ruler and tear along the straight line.
Tip 9: Instantly Hold Glue-Ups
Sometimes a clamp won’t fit where you need to hold a component during a glue-up, and other times you may be too impatient to wait for the wood glue to set before continuing with the project. Hot glue is a terrific crutch for wood glue in situations like these because it holds the glue-up immediately.
Before adding any wood glue, turn on your hot glue gun and let it warm up. Apply wood glue as usual after your hot glue is ready but leave little gaps in the piece to be attached every now and then.
After heating up your wood glue, squirt some hot glue into the gaps. Position the wood pieces together and hold them in position for a few seconds before applying the hot glue. The hot glue holds the two pieces together securely enough to continue working while also giving the glue sufficient time to form a stronger bond.
Tip 10: Sandpaper
Always keep a variety of abrasive papers close to hand in case you require a certain grit or kind. However, you may find that your sandpaper storage quickly becomes disorganized. One great storage method for keeping all your sandpaper organized is an inexpensive accordion-style file folder.
You can categorize the sandpaper by grit and use the front storage area for smaller sandpaper pieces. Now that you have all your sandpaper in one location, you can simply grab the folder and carry it to work with you.
Are you in need of business insurance* for your carpentry business? BizInsure makes comparing business insurance quotes quick and easy – without all the trouble. Compare business insurance policies and secure your business insurance in minutes today! Call us on 1-877-900-9998 or get a quote via our website.